PRU project build
In order to build the project you need the following:
-
Call a context menu on a PRU Configuration node and pick
Run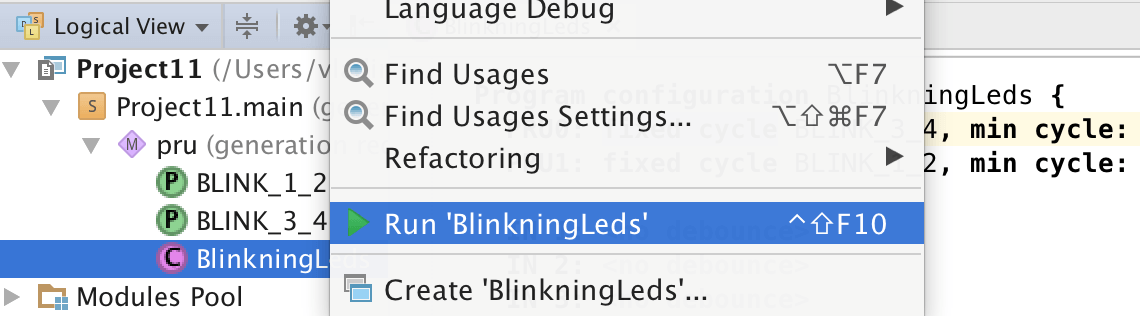
-
Specify the output path in the opened window. In case you run
Windowsthe path could be likeC:\Temp, however please refrain from using spaces.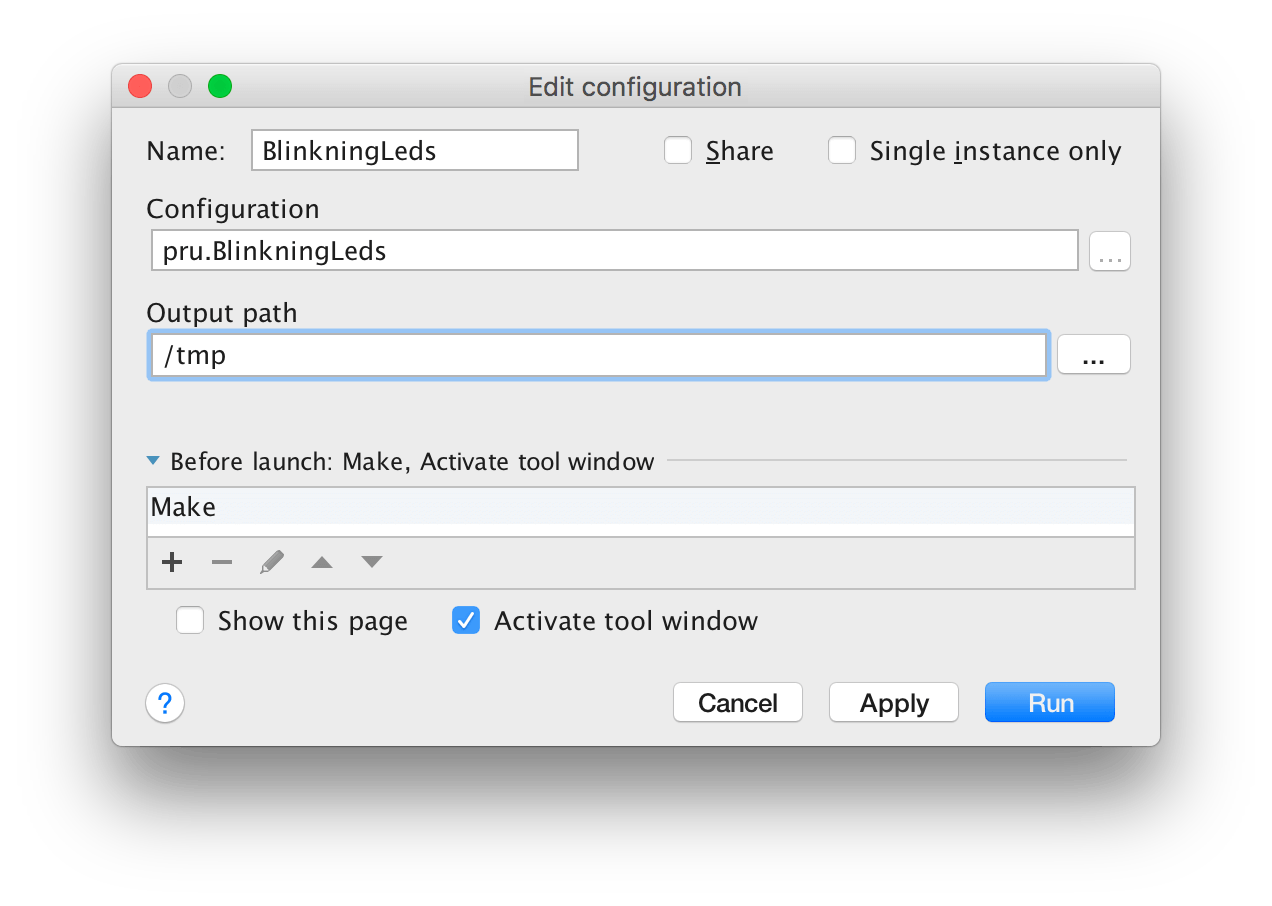
-
As you hit
RunIDE will build the project. The result is printed in theRuntool window at the bottom (if it did not get activated, you could switch the required tool window)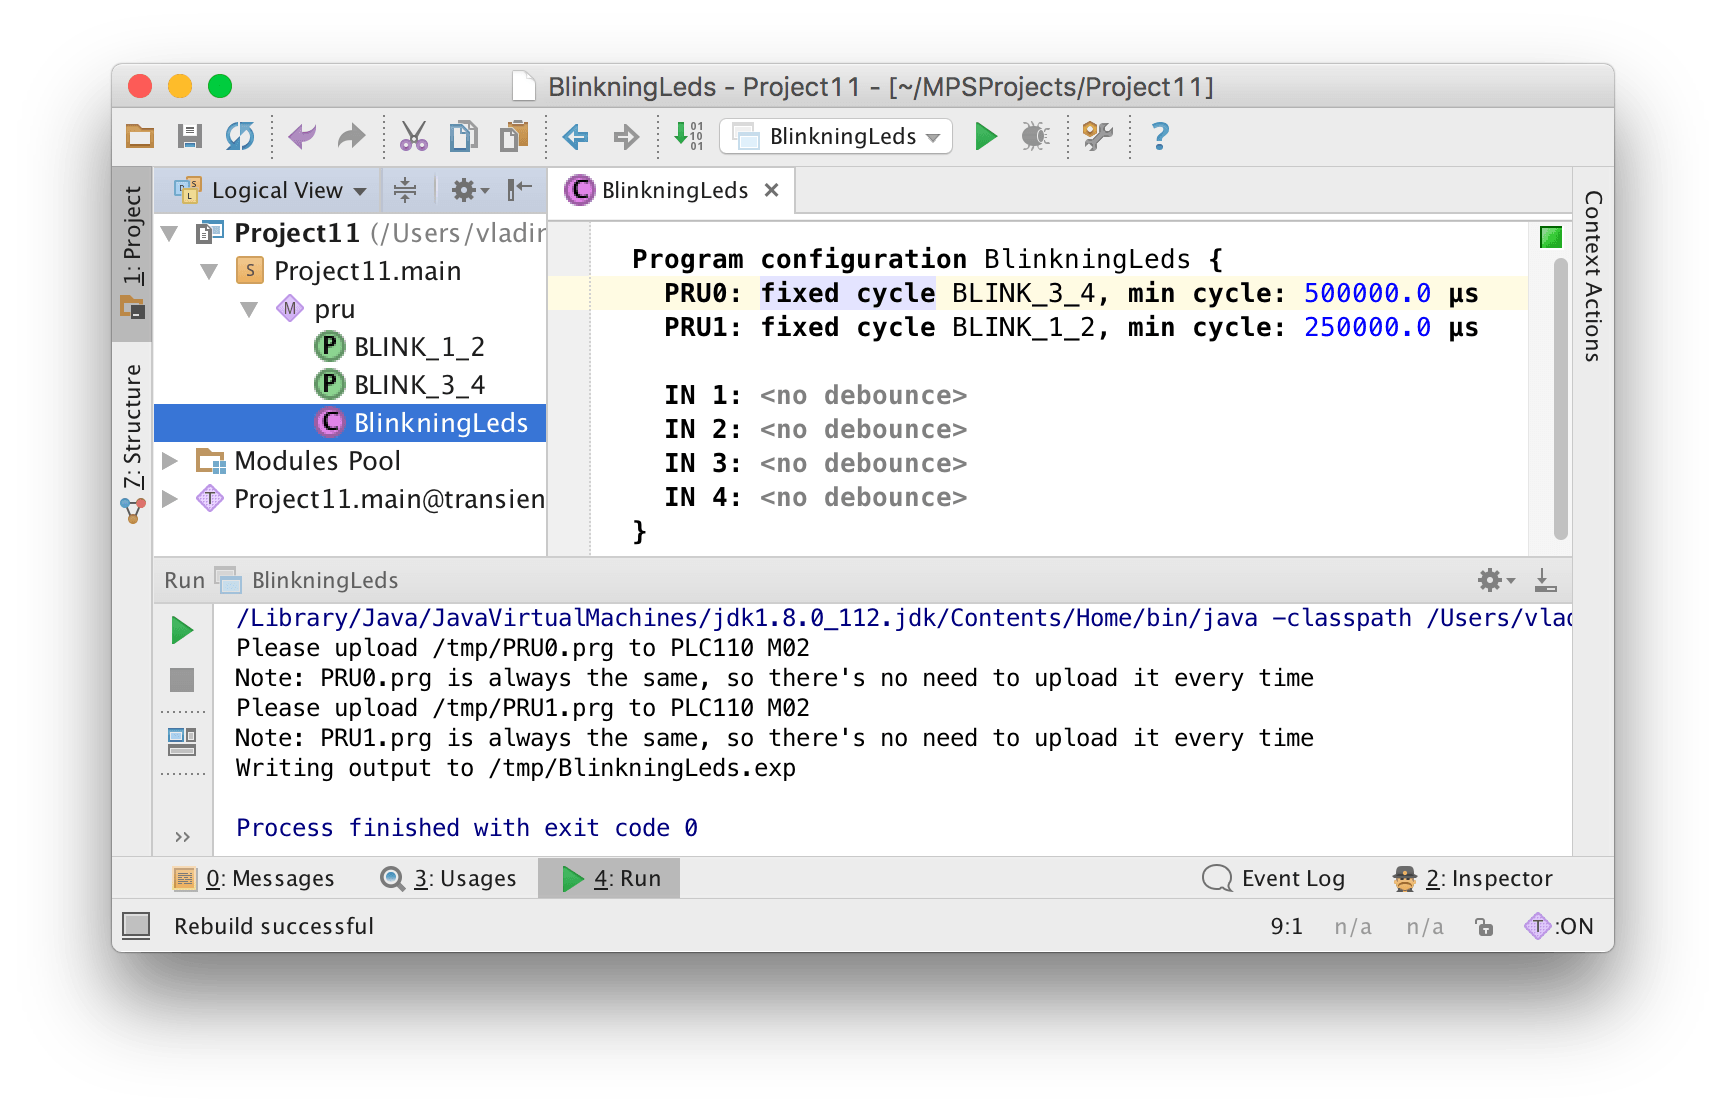
As you created run configuration, you can just hit the green triangle at the screen top or at the left in the Run tool. You can use Run > Run menu as well.
As seen above:
- The IDE created
/tmp/PRU0.prg,/tmp/PRU1.prg, and/tmp/BlinkningLeds.expfiles - The files
PRU0.prgandPRU1.prgare always the same (they will be the same for all the projects build from Hardella IDE) /tmp/BlinkningLeds.expwill be used as wrapper so CoDeSys program could communicate with PRU cores
Leave a Comment